Suscribe to our newsletter:
Suscribe to our newsletter:
PREPARATION OF REPAIR
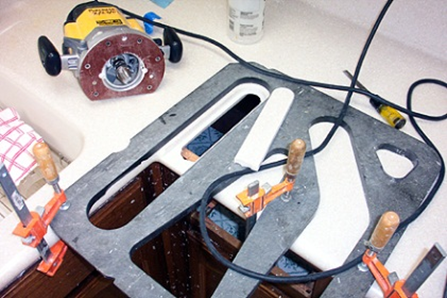
Cracks on solid surface can't just be filled, it will only crack again. A good start is drilling a very small hole at each end of the crack; this will stop the crack from spreading. About a ¼” drill must works well. After to make the crack stopper drills, use a router and a straight cutter to trimming out all the thickness through the whole trajectory from the starting to the end crack stopper drills.
|
Professionals use a custom made template for using in an advanced technique which is called “pie-slice” patch, when crack is spread in a wide area or goes through in an irregular trajectory. This technique needs a portion of solid surface material which is usually got from the sinks and stove cut-outs, in order to avoid color matching issues. The template is used to perform a cut-out surrounding the cracked area to taking it out and an identical piece is obtained with the same shape template from scrap material. This results in a “jigsaw” piece which fits perfectly on the performed cut-out. |
|
Clean perfectly the repair area with denaturalized alcohol or acetone. The seaming area must be free of dust and grease.
Use the seaming compound following the manufacturer directions and allows curing enough time until the seaming is hard at touch and does not feel sticky.
When the seam is hard enough, grinding off the excess using sand paper and an orbital sander machine.
Begin by lightly buffing down the scratches with fine grit sandpaper.
Increase grit as needed.
Notice to Reader
To the best of our knowledge, the information contained herein is accurate. However, neither the above named manufacturer nor any of its subsidiaries assumes any liability whatsoever for accuracy or completeness of the information contained herein.
Final determination of suitability of any material is the sole responsibility of the user. All materials may present unknown hazards and should be used with caution. Although certain hazards are described herein, we cannot guarantee that these are the only hazards that exist.


| Copyright 2020. | Tel: 52 (33) 1253-7200 info@lafex.com.mx | Powered by |